 Ever tried to take off your Love Handle phone grip and realized it’s stuck like superglue? Don’t worry you’re not the only one. These grips are designed to stay put, but removing them safely without damaging your phone is actually simple once you know the right steps.
Here’s the short answer before we go deeper:
To remove a Love Handle phone grip, heat the adhesive slightly with a hairdryer, gently slide a plastic card or dental floss under it, and clean the residue with rubbing alcohol or adhesive remover.
Let’s walk through how to do it step-by-step, along with some clever tricks to keep your phone spotless afterward.
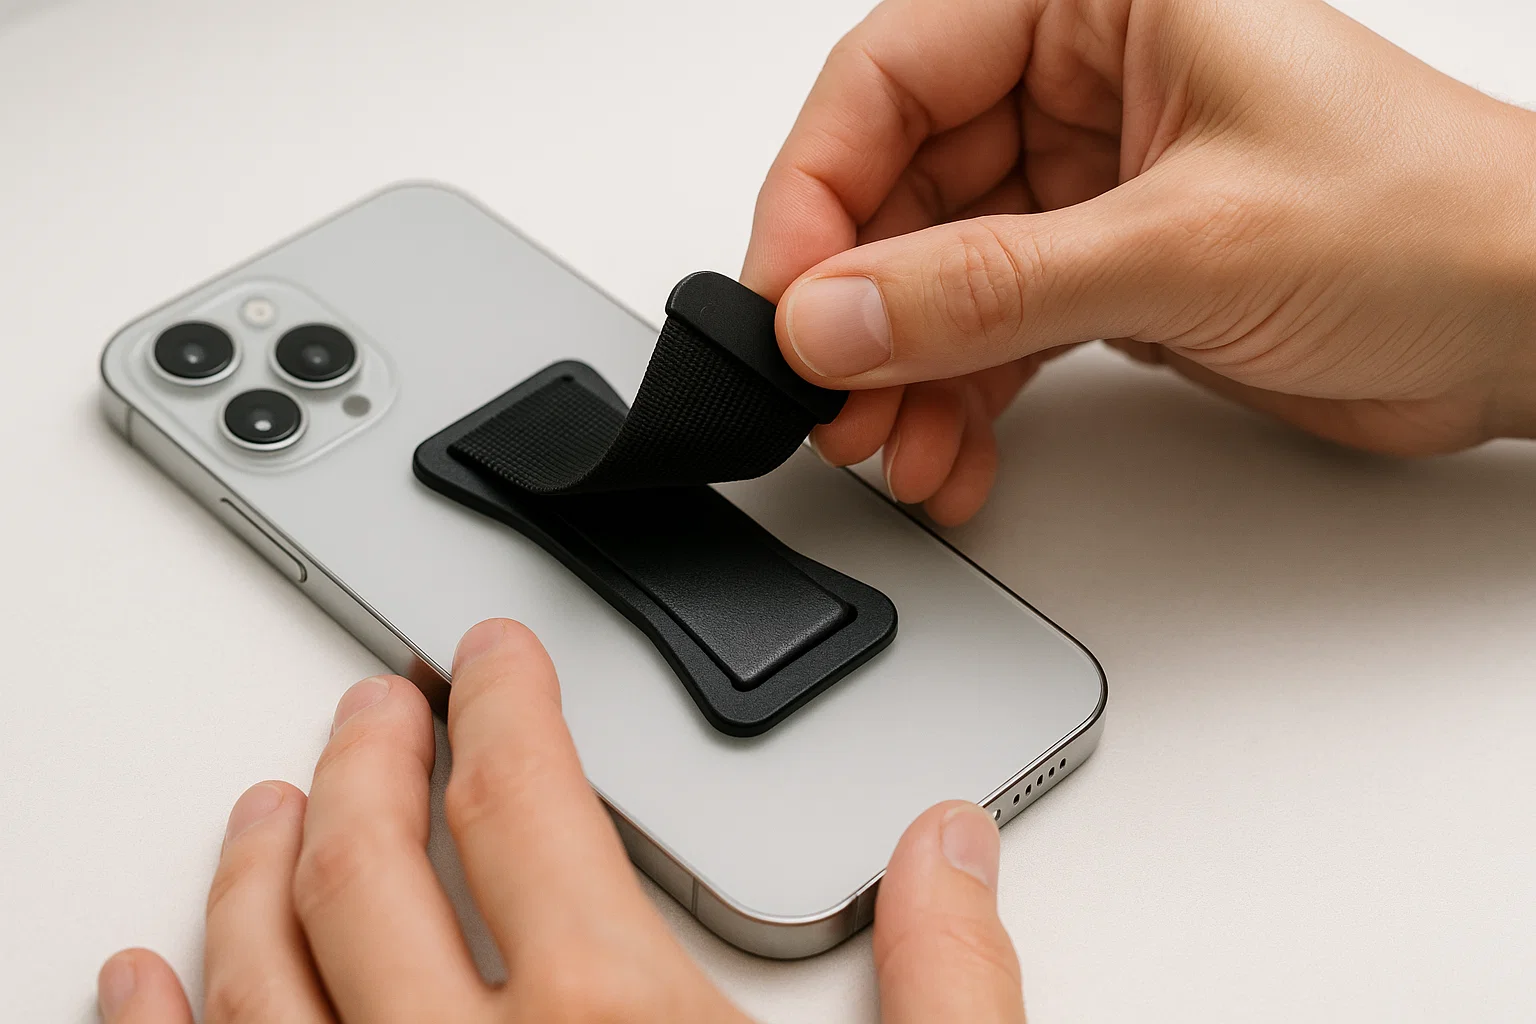
What Is a Love Handle Phone Grip and Why It’s Hard to Remove?
A Love Handle phone grip is that slim elastic band glued to the back of your phone or case that lets you hold it comfortably kind of like a mini handle. It’s stylish, practical, and surprisingly strong.
That strength comes from a 3M adhesive pad that’s meant to last months or even years. The problem? That same stickiness makes removal tricky.
Why it sticks so well:
- Industrial-grade 3M adhesive pad
- Slight vacuum seal created when pressed
- Residue buildup over time that strengthens the bond
So, the goal here is simple break that adhesive bond safely without scratching your phone or cracking the grip base.
How to Remove Love Handle Phone Grip Without Damaging Your Phone?
Alright, let’s get to the main part. You don’t need fancy tools just patience and a few household items.
🧰 You’ll Need:
- Hairdryer (or a bowl of warm air from a heat gun on low)
- Dental floss or thin plastic card (like an old credit card)
- Rubbing alcohol or adhesive remover
- Microfiber cloth
- Gentle hands (seriously!)
🔹 Step 1: Heat the Adhesive Gently
Heat loosens the glue, making it soft enough to peel without tearing.
Hold the hairdryer about 6–8 inches away from the grip. Move it in circles for 30–45 seconds.
You’ll feel the base get slightly warm that’s when it’s ready.
⚠️ Don’t overheat it. Too much heat can warp your phone case or damage glass backs (especially on iPhones or Samsung Galaxy models).
If you’re using a heat gun, keep it on the lowest setting and wave it gently like you’re roasting a marshmallow.
🔹 Step 2: Slide Floss or a Card Underneath
Once the adhesive is warm, grab dental floss or a plastic card (avoid metal blades they can scratch).
Work the floss under one corner of the grip and start sawing gently back and forth. You’ll feel some resistance, but keep going slowly.
If you’re using a card, wiggle it under the grip base and lift gradually. The goal isn’t to pry it’s to separate the glue from the surface.
💡 Pro Tip: If you feel it harden again, apply a bit more heat for 15 seconds before continuing.
🔹 Step 3: Remove Residue and Clean the Surface
After the grip comes off, you’ll probably see a thin sticky layer left behind. That’s normal it’s just leftover adhesive.
Here’s how to clean it safely:
- Pour a few drops of rubbing alcohol (or adhesive remover like Goo Gone) on a microfiber cloth.
- Rub the surface in circles for 30–60 seconds.
- Wipe again with a dry part of the cloth.
Your phone back should now look as good as new smooth, shiny, and grip-free.
Can You Reuse a Love Handle Grip After Removing It?
That depends.
If the adhesive pad looks clean, flat, and still sticky, you might be able to reuse it once or twice. But honestly, once it’s peeled off, the glue loses a lot of its strength.
The safest move is to buy a replacement adhesive pad they’re cheap and made to fit perfectly.
💬 Alex’s tip: “I tried reusing mine once, and it held for two days before falling off mid-scroll. Not worth the risk get a fresh pad.”
How Do You Remove a Love Handle From a Phone Case (Not the Phone)?
If your grip is on a plastic or silicone case, you’re lucky it’s even easier.
Here’s how to do it:
- Take off the case first (so your phone is safe).
- Heat the back of the case instead of the phone itself.
- Use a plastic card or dental floss the same way.
- If the case material stretches, go slowly and support it with your other hand.
Once removed, clean both the grip and case before reusing or applying a new one.
What If the Adhesive Won’t Come Off?
Stubborn glue is the most annoying part. But it’s fixable.
Try one of these:
- Rubbing alcohol: Gently softens most adhesives.
- Coconut oil or baby oil: Great for sensitive surfaces; works slower but safe.
- Adhesive removers (Goo Gone): Strong and fast just don’t soak the phone.
Avoid nail polish remover or acetone it’s too strong and can melt coatings or case materials.
Does Heat Damage Your Phone?
No, not if you’re careful. You’re not trying to bake your phone just loosen glue.
Keep the hairdryer at a safe distance and move it constantly. Aim for warm, not hot.
If your phone feels too warm to touch, stop immediately and let it cool down.
What to Do After Removing the Grip?
Once your phone is clean, this is the perfect moment to:
- Apply a new grip or PopSocket
- Add a transparent case to protect the surface
- Or just enjoy the smooth minimalist look
If you’re reinstalling a grip, make sure the surface is completely dry and oil-free before sticking it back.
Press for 30 seconds and let it rest for 1 hour before using it again this helps the new adhesive bond fully.
How to Prevent Sticky Residue Next Time
The easiest trick? Use a thin phone case instead of sticking grips directly to your device.
Why it helps:
- You can remove or replace it anytime.
- Your phone stays scratch-free.
- You can swap between designs without mess.
If you must apply it on glass or metal, a clear adhesive film (sold on Amazon or mobile shops) creates a removable base layer so you peel off the film, not your phone.
Alternative Methods (If You Don’t Have a Hairdryer)
No hairdryer nearby? No problem. Here are 3 alternative methods that work surprisingly well:
1. Warm Rice Bag or Towel
Microwave a small cloth or rice pack for 20–30 seconds. Press it gently on the grip for one minute to warm the glue. Then slide a card underneath.
2. Hot Water Trick (For Cases Only)
If your Love Handle is on a plastic phone case, dip the case (without the phone!) into warm water for 2–3 minutes. The heat will soften the adhesive.
3. Room Temperature Peel
If the grip is old, sometimes you can just wiggle and peel slowly with your fingers no heat needed.
Can You Replace Just the Love Handle Adhesive?
Absolutely. Love Handle sells replacement adhesive kits online.
They come with new 3M strips cut to fit the base perfectly.
To replace it:
- Clean both surfaces with alcohol.
- Peel and apply the new strip to the grip base.
- Press firmly for 30 seconds.
- Wait at least an hour before using.
Easy, cheap, and your grip feels brand new again.
Is It Safe to Use Goo Gone or Adhesive Removers?
Yes, but with caution. Goo Gone and similar products are safe for metal and plastic surfaces but not ideal for soft silicone or unprotected glass.
If you’re unsure, test it on a small corner first.
Always wipe the surface with a damp cloth afterward to remove oily residue.
Why People Remove Their Love Handle Grip
Not everyone removes it because it’s broken. Sometimes it’s about upgrading or just changing the vibe.
Here are a few common reasons:
- You got a new phone case or new phone
- The elastic band stretched or faded
- You’re switching to MagSafe accessories
- The adhesive lost grip over time
- You simply want a cleaner look
Whatever your reason, you can remove it safely and make your phone look like new again.
My Quick Love Handle Removal Story
So, when I first tried removing my Love Handle, I panicked.
It felt like it was welded to my phone case. I almost used a knife (don’t do that!).
Then I tried this method: warmed it up with my hairdryer, slid a floss under, and it popped off cleanly.
A bit of alcohol wiped the residue off completely.
Took me five minutes tops and no damage at all.
That’s why I always tell readers: don’t rush it heat + gentle pressure = perfect removal.
Removal Methods
| Method | Works Best For | Tools Needed | Caution |
|---|---|---|---|
| Hairdryer + Floss | All phones and cases | Hairdryer, floss | Avoid overheating |
| Hot water | Plastic cases only | Warm water bowl | Never for real phones |
| Goo Gone | Metal or glass phones | Cloth, remover | Wipe off oily residue |
| Coconut Oil | Any surface | Cotton ball | Takes longer but safe |
| Old Card | Cases and flat phones | Expired credit card | Go slow and steady |
Common Mistakes to Avoid
Before you grab anything sharp, here’s what not to do:
- ❌ Don’t use a knife or metal blade
- ❌ Don’t pull it off cold (you’ll damage the case)
- ❌ Don’t soak your phone in water or alcohol
- ❌ Don’t use acetone it melts coatings
- ❌ Don’t rush patience saves your device
A few minutes of care beats hours of regret.
How Long Does It Take to Remove a Love Handle Grip?
Usually 5 to 10 minutes, depending on the adhesive’s age.
Older grips might take longer since the glue hardens with time.
The heat step is key skip it and you’ll fight against rock-hard glue.
Take breaks if needed, and don’t forget to let your phone cool down afterward.
FAQs About Removing Love Handle Phone Grips
Q: Can I reuse the grip on another phone?
A: Only if the adhesive is still sticky and clean. Otherwise, use a replacement pad.
Q: Will removing the grip void my phone’s warranty?
A: No. It’s a removable accessory, not a modification.
Q: What if my phone has a glass back?
A: Be gentle and avoid overheating. Use moderate heat and dental floss instead of a card.
Q: What’s the safest cleaner to use afterward?
A: Rubbing alcohol or a mild adhesive remover avoid harsh chemicals.
Q: Can I remove it if it’s partially broken?
A: Yes. Pry gently using a card, even if part of it broke. The heat will soften the rest.
Final Thoughts
Removing a Love Handle phone grip might look tough, but once you know the trick a bit of heat, a slide, and a wipe you’ll wonder why you ever struggled.
The key is gentleness and patience. Don’t yank, don’t scrape. Just loosen, slide, and clean.
Your phone deserves a little care, and trust me doing it right makes all the difference.

Alexandra Smith: All things tech, News, Social Media Guide, and gaming expert. Bringing you the latest insights and updates on Mobiledady.com